Hack Your Workflow
Since I started coding a year ago, I’ve learned many useful practices that have drastically increased my coding efficiency, both for CS psets and web/software development. This post is a catalog of best practices and hackerish tricks that I’ve picked up. It should be helpful especially to those who so far have only coded in an academic setting where none of this is discussed. These tools should help you spend less time fussing with your utilities, giving you more time to work on solving problems and building things.
(Note that this guide is primarily written for Mac users. I’m not sure if all apps/tools carry over to PC and Linux)
Using the Terminal
Tip 1: Download iTerm2
Don’t just use the built in Mac terminal. iTerms 2 a terminal emulator that has great features. For instance, it lets you open multiple tabs for multiple terminal sessions, and has 256 colors. Generally it looks and feels better than the default Mac terminal.
Tip 2: Use zshell and personalize it
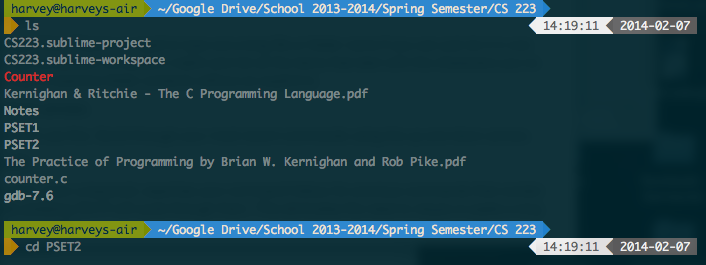
I use zsh mainly for its powerful autocompletion. This helps with finding/selecting files and directories. Instead of just listing matched items like bash, Zsh allows you to tab through them and select the one you want, saving you a lot of typing. Zsh also expands the path for you if matches a single directory. Here I type cd and tab through:

Another reason to use zsh is that you can customize its appearance. Here is my terminal:
You can change your prompt to include info like your working directory, the date, system diagnostics (CPU and RAM usage, etc), even the weather. People typically use oh-my-zsh to manage and install zsh packages. As for my zsh theme, I took it from my brother David. It’s included in his workflow configuration script.
Tip 3: Get Good With Linux Commands.
Here are the two resources I used to learn the basic commands, as well as how the system directory works: Linux Fundamentals, Linux Information Project. Having to look up commands such as cd, ls, touch, etc. can really slow you down. Once you memorize them, navigating folders with commands is as fast, if not faster, than doing through an operating system’s GUI.
Here are some useful unix commands:
cat, head, and tail — displays the entire, beginning, or end of file. Use flag -n x to display first or last x lines
ls — list files in current directory. -l gives additional information and -a shows hidden files denoted by period.
mv — moves files, renames files or folders
mkdir — create folder
rm — deletes file
touch — creates file
Tip 4: Use tab completion.
This one can really save you time. There’s no need to type out a long file or folder name if you can just do it in one keystroke. Furthermore, tab completion will pattern match and list all the items that start with the characters you’ve entered. This is an easy way to examine folder contents without an explicit ls.
Tip 5: Use the up and down arrows.
It pains me to see coders not use this. Scroll through your most recent commands using the up and down arrows.
Tip 6: Use reverse search.
Ctrl-R opens a program that, given a keyword, searches your command history for previous commands that contain that keyword. Repeatedly pressing Ctrl-R will cycle through them. This eliminates the need to retype or paste a long command that you can’t remember.
Also, the history command will list previously typed commands.
Tip 7: Get Autojump
This program, available here, makes it incredibly easy to get around to the folders you need to. Autojump remembers folders you’ve CD’ed to, and ranks them based on frequency of use. When entering a keyword, it will match against that list and return the most frequently used folder. So, instead of typing ~/harvey/Desktop/School/.../CS223, I can simply type j 223.
Working Remotely
Oftentimes we need to work using a remote server. This section should be especially helpful for Yale CS students accessing the Zoo. Instead of using fastX or other annoying file transfer programs you can access the Zoo server directly through your terminal.
Tip 1: SSH
The ssh command allows you to connect to a server. To connect to the zoo, you would type:
ssh netID@node.zoo.cs.yale.edu
To save time, I recommend setting up an ssh config file located at ~/.ssh/config and creating a shortcut name that automatically enters the correct user and address.
- cd to your
~/directory and check if you have a .ssh folder (usels -a) - If you don’t, simply create one using
mkdir .ssh - Enter the folder and create or edit a “config” file.
Enter the following:
 Host zoo
 HostName lion.zoo.cs.yale.edu
 User (your netID)
To avoid having to enter a password, you can add your RSA public key to the authorized_keys folder of the zoo. All of that (including how to create a public/private RSA keypair) is detailed here.
Tip 2: SCP
Say you’ve been working locally and you’re ready to test your script against Stan’s public test cases. You can transfer file(s) to and from the server using the scp command. Here is an example:
scp Binpack.c log.c makefile zoo:cs223/PSET2/
This command means, transfer the following files: Binpack.C, log.c, and makefile to the zoo server, specifically in the folder cs223/PSET2/.
To scp something from the server, simply place the remote file first, and the local directory second.
scp zoo:cs223/PSET2/Binpack.c .
Use Sublime Text for coding
Programmers all have different preferences for how they write code. Some like to use IDE’s, others like using text editors.
If you are using a text editor, don’t use emacs or notepad. You should be using an editor that at least has syntax-highlighting. This makes writing, reading, and debugging code much easier by outlining syntactic information visually.
Among text editors, the two most popular are Vim and Sublime Text. Vim is a command line program that relies on keystrokes to do things. It’s hard to get used to, but experience Vim users can edit text quickly, using a few number of keystrokes. There’s even a site called Vimgolf, where players are challenged to do things in the fewest keystrokes possible.
There’s a big debate on whether to use Vim or Sublime Text. I think both are great and the right choice depends on the coder. Personally, I use Sublime Text because I’m more used to GUI style typing. I like being able to click somewhere to place my cursor, and not having to worry about switching being typing mode and command mode. Originally I was going to learn Vim, but I decided it wasn’t worth the first few weeks or months of slower coding.
There are so many awesome features built in to Sublime as well as in add-on packages. The following are the main settings and packages I use:
- line ruler at the 80 character mark
- use 4 spaces for tabs (never use tabs for indents, they can sometimes cause compile errors)
- highlight current line
- Sublime Linter (lints my code for trivial syntactic errors)
- Valign (lines up surrounding vertically based on syntax)
Here are my user settings:
{
"auto_complete_commit_on_tab": true,
"bold_folder_labels": true,
"caret_style": "phase",
"color_scheme": "Packages/User/Solarized (Dark) (SL).tmTheme",
"font_size": 13.0,
"highlight_line": true,
"highlight_modified_tabs": true,
"ignored_packages":
[
    "Vintage"
],
"line_padding_bottom": 1,
"line_padding_top": 1,
"rulers":
[
    80
],
"translate_tabs_to_spaces": true,
"word_wrap": true,
"wrap_width": 100
}
Solarized Colors
At first I didn’t understand why it seemed like all the hackers I saw used this dark bluish color scheme. But then I tried it out. Something about the combination of colors make this color scheme incredibly pleasing to the eye. I’ve tried other color schemes to keep things interesting, but I always revert back to solarized. What’s nice is that since it’s so popular, there’s a solarized theme for almost everything out there.
Try it out, I bet you’ll like it.